


Fender liner quality check
Jan 29, 2022
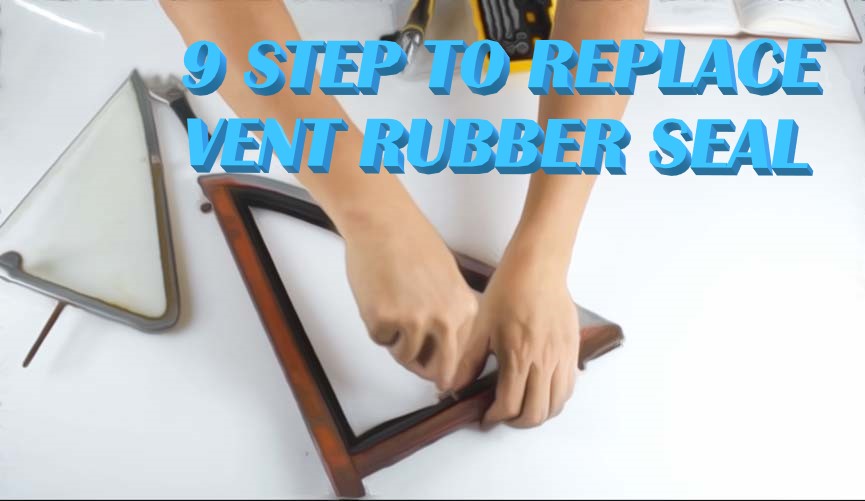
9 step to replace the Vent rubber seal
Dec 30, 2021
By
admin
0 comment(s)
9 steps to replace Vent Window Rubber Seal
Simply explain step by step how to replace the vent rubber seal. Basic concept that could apply to each car model.
- Remove the whole vent frame off from the door and turn the vent window open at 90 degree.
- Remove the glass frame from vent window frame by loosening the nut and spring washer from the base of Vent frame around the hole axis area.
- Loosen the front Upper pivot point from the window glass frame.
- Remove the old Vent Window Rubber Seal that was damaged, broken or cracked from the Vent frame.
- Replace the new Vent Window Rubber Seal and please beware for putting the Vent Window Rubber Seal on the correct side. Can check details how to distinguish it here.
- Make sure that hole axis at the base of Vent Rubber Seal align with the hole of Vent frame base.
- Check the fitting around the Vent Window Rubber seal and the Vent frame that they are closely connected.
- Install the Glass frame that was initially removed by starting to insert the Axis into the hole base and firmly clinch the Spring washer. Then attach the Upper pivot point with the Glass frame.
- Test the opening and closing of the Vent glass frame that it can be done freely and not stuck anywhere. Then reinstall the Vent frame to car door.
email us if you have any question.
Sale Products
Lastest Posts
-
-
9 step to replace the Vent rubber seal Dec 30, 2021
-
Vent window rubber seal replacement Dec 23, 2021
Categories