
Fender liner quality check
Jan 29, 2022
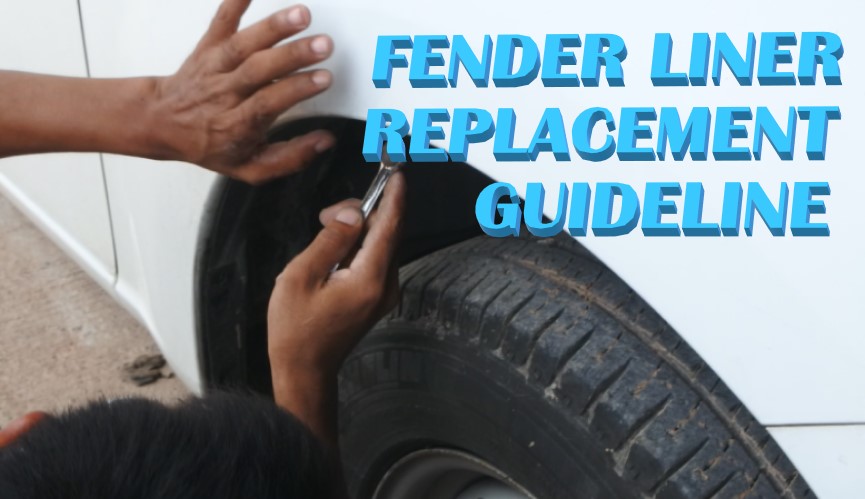
Guideline for replacing Plastic Inner Fender Liner by yourself
Jan 18, 2022
By
admin
0 comment(s)
Guideline for replacing Plastic Inner Fender Liner by yourself
It might be normal for the unexpected situation on the road while driving and having an accident or a collision. It can cause the damage to the front section of the car, whether it is headlights, bumpers, front grille, including Plastic Inner Fender Liner that will be break and come off.
What’s Plastic Inner Fender Liner? Where is it need to be installed?
Plastic Inner Fender Liner is an important part to protect the engine from the impact of rocks, dirt, mud or even dust that cause rust. Without this Inner Fender Liner, the service lifetime of various parts in the engine room can be shorter than it should be and might pay for the large amount for maintenance it. However, this can be easily protected by using Plastic Inner Fender Liner that is very lightweight, cheap and easy to replace it.
The position of Plastic Inner Fender Liner is in the invisible spot if looking it from the outside. This part will cover the top of the wheel and attached to the front Fender and Bumper in each section with clips.
Is the Inner Fender Liner replacement necessary?
Inner Fender Liner often damaged by accidents which causing fractures or the deterioration at the holding point of the clips. So, the part might be come off at some points and it is extremely risky if you don’t check it before driving. The vibration or the loosing of the part can sometimes cause a trouble with the steering and resulting in severe damage of incomplete steering. Therefore, we should always check the condition of Inner Fender Liner that it is firmly attached to the car body and all the clips still in the good condition.
How to find the correct Inner Fender Liner part?
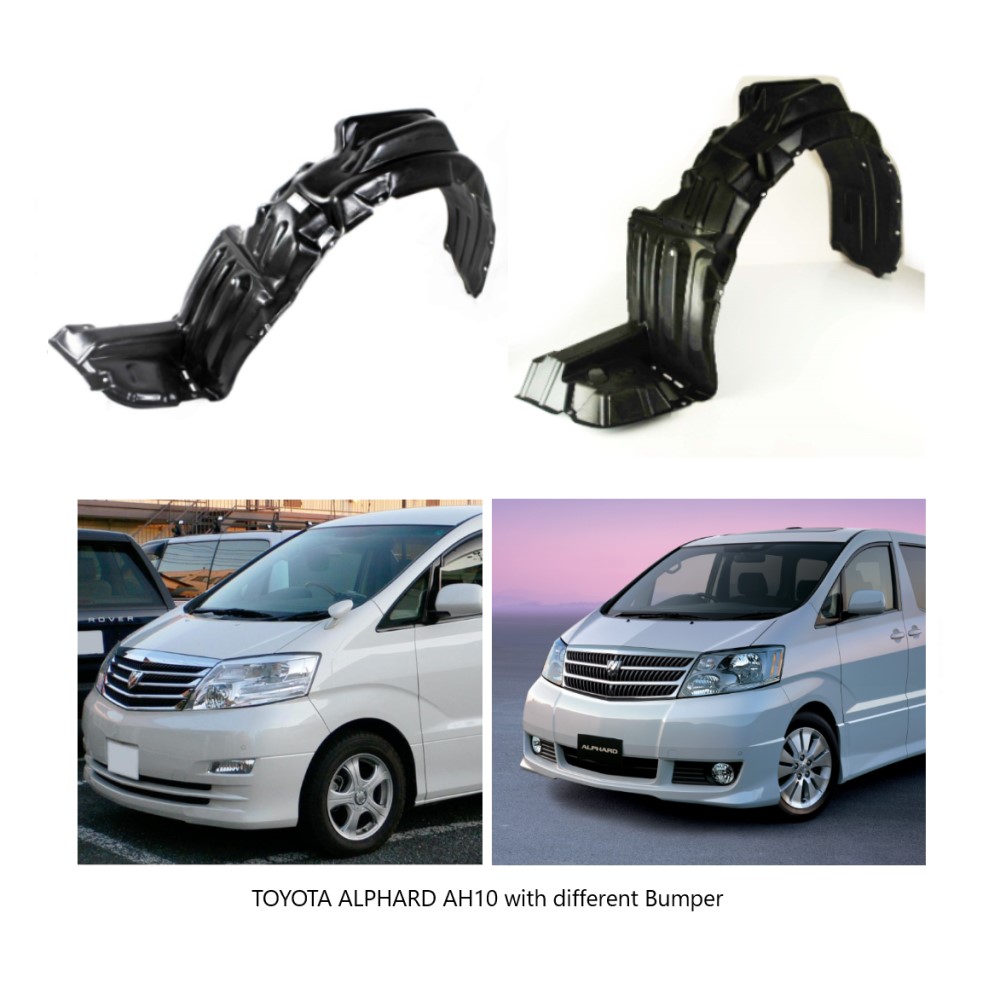
In each car model, there are different shapes and unique designs. So, each of Inner Fender Liner part will be completely different as well. Initially, you may need to have a basic knowledge of Body Code in order to purchase the correct part of Inner Fender Liner. In case you are not sure about the car model or Body Code. Advance Auto Supply is gladly to give you an advice, just send us a message, comment or email us. We have an expert team to assist and service you.
Besides of the different exterior shapes in each model. There is an important section that must be emphasized before installing which it is the location of the mounting holes. In each car model even with the same chassis number or model name but there is a minor change in that model whether the shape of the headlights, front grille, and bumper. As mentioned earlier that the Inner Fender Liner need to attached to the front Fender and Bumper. So, these two parts can indicate us that even it is the same car model name but the Inner Fender Liner might be different according to minor change in the form of Bumper or Fender
How to replace Inner Fender Liner?
After we have the correct Inner Fender Liner part for the car model, starting by removing the old Inner Fender Liner (If it’s lost, then skip it because there is nothing to remove) and pulling out each retaining clip until all of them are removed. A plastic crowbar can be used if the retaining clip is push-in type. If some sections are screws then screw it out. It would be helpful to have little jack to lift the car up or if there is no jack, don’t worry just turn the steering wheel to turn the wheel to the other direction. It can help to open the area for removing the Inner Fender Liner.
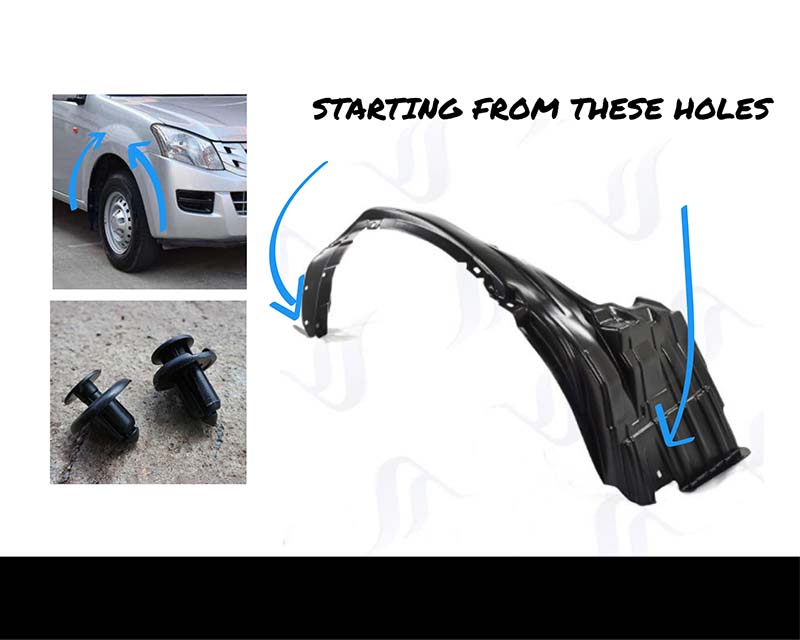
After that, installing the new Inner Fender Liner by inserting up to the top of the wheel and check that every hole is correct. Make sure to match the mounting holes to the Fender and Bumper. Then bring the clips and install at various points one by one until it complete.
Tip : For installing the clips in each points, we recommend to install the outside position at the front and the end first. After that, starting to install clips in the middle position to both sides until every hole points complete. Because it will be able to adjust each position holes and fitting it precisely. In case installing sequence from front side to the last holes in a row, it will be difficult to adjust the parts in the very last hole sections.
Explore plastic inner fender liner products here.
Sale Products
Lastest Posts
-
-
9 step to replace the Vent rubber seal Dec 30, 2021
-
Vent window rubber seal replacement Dec 23, 2021
Categories